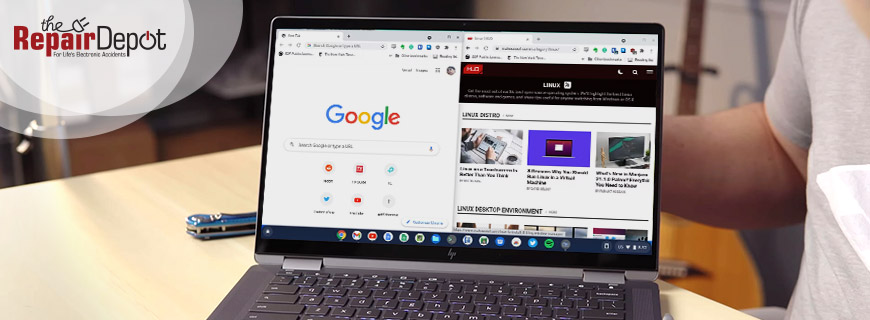
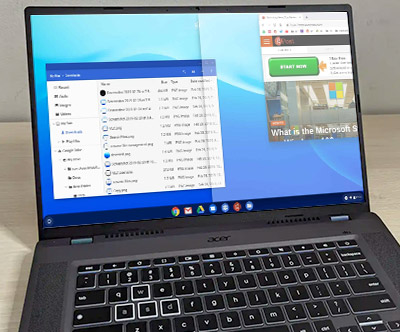
If you want to multitask more efficiently on your Chromebook – maybe to take notes while watching a video or compare two documents side by side – split-screen mode is the perfect solution. This feature lets you view and work on two apps at once on your screen without constantly switching between windows.
There are several ways to activate split screen on your Chromebook, and we'll walk you through each method so you can use the one that works best for you.
Method 1: Using the Maximize Button
You can easily split your screen by using the window control buttons.
- Open the two apps or windows you want to use.
- Click and hold the maximize button on one of the windows (the square icon in the top-right corner of the window).
- You'll see two arrows. Choose the left or right arrow that appears to snap the first window to one side of the screen.
- Repeat the process with the second window and snap it to the opposite side.
Now you have two windows open side by side.
 Method 2: Using Drag and Drop
Another simple way to split your screen is by dragging windows manually.
- Open the two apps or windows you want to use.
- Click and hold the title bar of the first window.
- Drag it to the left or right edge of the screen until you see a transparent outline.
- Release the window to snap it into place.
- Do the same for the second window on the opposite side. The second window will automatically fill the other half of the screen.
Now you have two windows you can use at the same time.
Method 3: Using Keyboard Shortcuts
If you prefer using keyboard shortcuts for faster navigation, this method is for you.
- Open the first window you want to use.
- Press Alt + [ to snap it to the left side.
- Open the second window and press Alt + ] to snap it to the right.
Now you have two windows neatly arranged on your screen.
Method 4: Using the Overview Mode
You can also split screen using the Overview Mode.
- Open the two apps or windows you want to use.
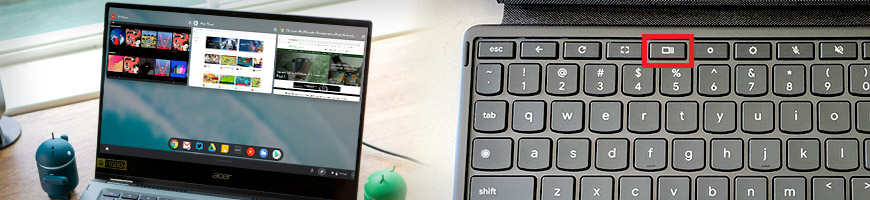
- Press the Show Windows Key (it looks like a rectangle with two lines on the right).
- A preview of all open windows will appear. Click and drag one window to the left side of the screen.
- Select the second window and drag it to the right side of the screen.
Now you have two windows displayed side by side.
Adjusting Window Sizes
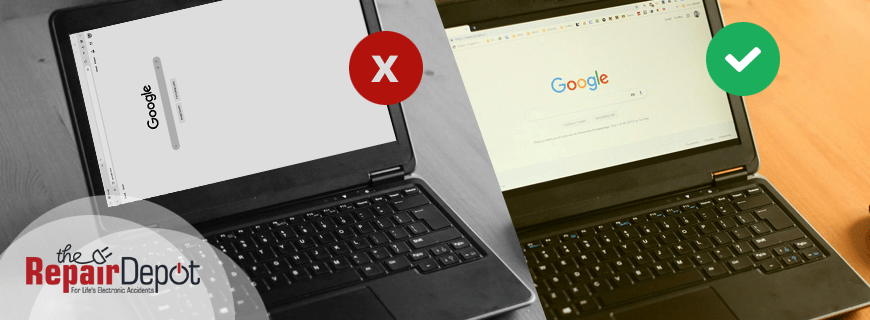
Once your two windows are side by side, you can adjust the size of each one. If you need more space on one side, hover your mouse over the divider between the two windows. When you see the two-arrow icon, click and drag it left or right to adjust the size.
Exiting Split-Screen Mode
To exit split-screen mode, click the maximize button (square icon) on one of the windows, or simply drag the divider all the way to one side to close the other window.
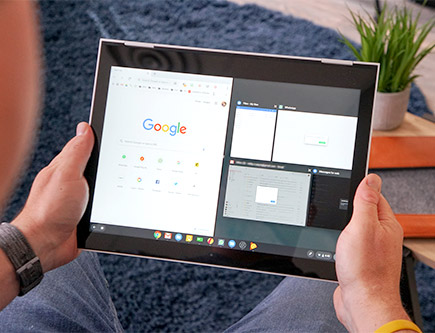 How to Use Split Screen on a Chromebook in Tablet Mode
If you're using your Chromebook in tablet mode, you can still use the split-screen mode when needed. Here's how:
- Open the two apps or windows you want to use.
- Swipe up from the bottom of the screen and hold to open the Overview Mode (this shows all open apps).
- Drag the first app to the left or right side of the screen.
- Tap the second app from the Overview, and it will automatically fill out the remaining half of the screen.
You can now use the two windows simultaneously and adjust the size of each one by dragging the divider between them left or right.
 Are you having trouble with your Chromebook? Whether it’s a cracked screen, liquid damage from a spill, or a device that won’t turn on, getting it fixed is easy with The Repair Depot.
We offer fast, professional, and affordable repairs for individuals and K-12 schools, all backed by a 90-day warranty on parts and labor. Get your Chromebook repair quote today!