Do you have a lot of photos stored on your iPhone, and you’d like to transfer some or all to your Mac? Whether you want to free up space on your phone, back up your photos, or edit them on a bigger screen, transferring photos from iPhone to Mac is a breeze. Let’s look at some of the most common ways to successfully complete this process, from the convenient AirDrop feature to the reliable Image Capture app.
 Transfer photos from iPhone to Mac using AirDrop
The simplest and fastest way to transfer photos from iPhone to Mac is with AirDrop, especially if you only need to transfer fewer photos effectively. AirDrop is a feature that lets you share files between two Apple devices wirelessly.
Before you begin, make sure your iPhone and Mac are within the Wi-Fi and Bluetooth range, and turn on Wi-Fi and Bluetooth on both devices. Also, check if both devices have AirDrop enabled. You can do this by swiping up from the bottom of your iPhone screen to access Control Center and tapping the AirDrop icon. On your Mac, you can enable AirDrop from the Finder window by clicking on AirDrop in the sidebar. Then, follow these simple steps:
- On your iPhone, open the Photos app and select the photos you want to transfer.
- Tap the Share button and select AirDrop.
- Select your Mac from the list of available devices to start the transfer.
- On your Mac, accept the incoming AirDrop request.
- Once the transfer is complete, the photos should appear in your Downloads folder on your Mac.
Transfer photos from iPhone to Mac using the Photos app
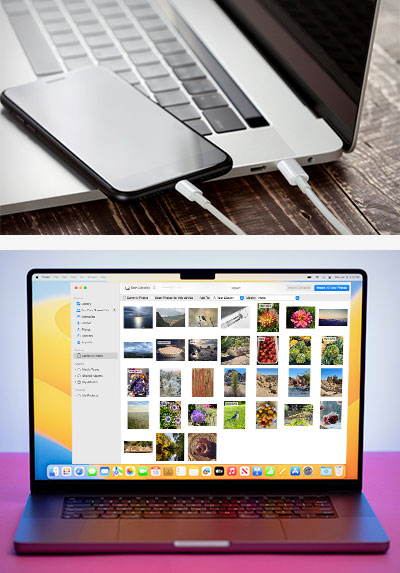
If you have iPhone and Mac, you’re likely already familiar with the Photos app. This app also lets you share photos between these two devices, but to do this, you’ll need a USB cable. Here’s how it works:
- Connect your iPhone to your Mac with a USB cable.
- Open the Photos app on your Mac.
- Your iPhone should automatically appear in the sidebar under Devices. If not, click the Import button at the top of the Photos app and select your iPhone from the list of devices.
- Select the photos you want to transfer to your Mac by clicking on them. You can either select individual photos or select all of them.
- Click the Import Selected button to transfer the selected photos to your Mac. Alternatively, you can click the Import All New Photos button to transfer all the photos that are not already in your Photos library.
- Wait for the transfer to finish, then disconnect your iPhone from your Mac.
 Transfer photos from iPhone to Mac using iCloud Photos
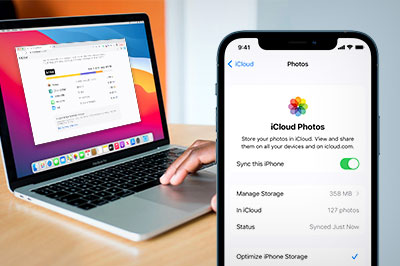
If you’re using iCloud Photos to sync your photos between your iPhone and Mac, the transfer happens automatically in the background. Your photos are uploaded to the cloud, and you can access them from any device with your Apple ID. All you have to do is make sure iCloud Photos is enabled on both your iPhone and your Mac:
- On your iPhone, go to Settings > Photos and turn on iCloud Photos.
- On your Mac, open the Photos app and select Preferences from the menu. Click on the iCloud tab and select the checkbox on iCloud Photos to enable it.
- Your photos will now be synced between your iPhone and your Mac automatically.
Transfer photos from iPhone to Mac using Image Capture
Image Capture is a built-in app on your Mac that allows you to upload photos from digital cameras and scanners. Still, you can also use it to transfer photos to your Mac from any device that has a camera, including your iPhone. This app can be handy for transferring a large number of photos. Here’s how to use it:
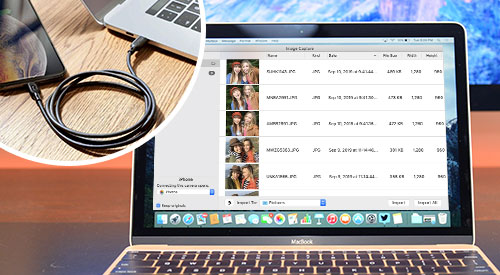
- Connect your iPhone to your Mac using a USB cable.
- Launch Image Capture on your Mac.
- Your iPhone should automatically appear in the sidebar under Devices. Click on your iPhone to see all the photos stored on your device.
- Select the photos you want to transfer to your Mac by clicking on them.
- Choose a destination folder on your Mac using the Import To dropdown menu.
- Click on the Import button to transfer the selected photos to your Mac.
- Once the transfer is complete, disconnect your iPhone from your Mac.
If you’re wondering how long it takes to transfer photos from your iPhone to your Mac, you should know that it depends on a few factors, such as the number and size of the photos, the transfer method you’re using, and the speed of your devices and cables. However, in most cases, transferring a moderate number of photos should take no more than a few minutes using any of the methods mentioned above.
 Transferring photos from your iPhone to your Mac should be a simple and seamless process, but things might not go so smoothly if you’re dealing with slow or malfunctioning devices. That’s where we come in. Our expert team can help diagnose and repair any issues you may be experiencing with your iPhone or Mac. So, don’t let device issues hold you back from enjoying your photos – get a free repair quote and get your devices back in top condition!